Showing posts with label mobile. Show all posts

Tuesday, November 5, 2013

Pygame Subset for Android Sprite Optimization with RenderUpdates


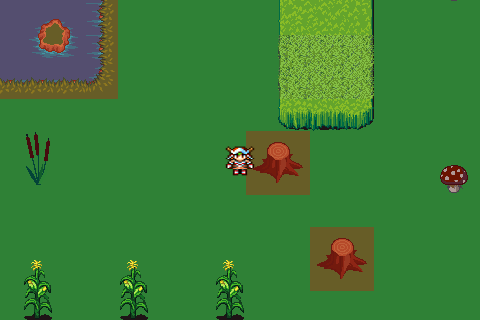
In order to get 2D map games written in python working faster on low-end Android phones, I experimented with optimizations. I purposely selected a complex background image in order to stress the application.

The first set of huge gains came from using the Surface.convert_alpha() method to optimize the images. This was easy and resulted in significant performance gains.

The trickier part was to update only the sections of the screen that had changed since the last cycle.

I decided to use sprites for this since many of the optimization examples I've seen use sprites.  Instead of using pygame.sprite.Group, I used pygame.sprite.RenderUpdates.  This is basically the same as the sprite group, but it as the enhanced ability to track the changed areas of the screen.

The images in the group are drawn to the screen with the standard sprite.Group.draw(SCREEN) method.  The cool little addition is the RenderUpdates.clear(SCREEN, background) method which clears the sprite by blitting a piece of the background over it.  Nice.

The final section is to update the display with a list of the rectangles, pygame.display.update(rectlist).

That's the main things to change.  I experimented with not ticking the pygame.time.Clock under android.   I'm not sure if it makes a difference, but the application appeared to me to run slower on android when I used the clock tick.

This is the first time that I've used this bit of code to pause the android device when the user hits things like the home button on the phone.


I was pretty happy that my alpha transparency worked with the sprite group.


I also experimented with different ways to optimize the events. However, I couldn't find anything useful.

Here's the full code.

Sunday, March 31, 2013

Lesson 5 - Going Mobile - Python on Android

Part one covers Python code modification.  Part two covers Android phone settings and configuration of Pygame Subset for Android.

Part 1


Technical points of part 1:
  • import android library and handle exceptions
  • map keyboard ESC key to Android back key (hard button) on phone
  • quit game if phone back key is pressed


Part 2

Technical points of part 2:
  • Set Android phone to debug mode
  • Configure game build with pgs4a
  • Build, package, install
  • Test game


Sunday, March 10, 2013

2D Tile Game Map - Building the JSON Map File


I created a video of a very simple 2D tilemap game running on the desktop and an Android phone.  The video focuses on creating a json map file.  The video will take you through step four of the process listed below:

  1. Assemble tilesets which are pictures of grass, trees, water, rocks, bushes, houses and other graphics in the game;
  2. Assemble other sprites for graphics such as the character running around the screen;
  3. Create map data file using the Tiled map editor;
  4. Export the file to JSON format;
  5. Create a map loader in python;
  6. Use pygame to display graphics and handle player interaction;
  7. Use Pygame Subset for Android to package the Python application in Android Package format
I didn't cover how to write the map loader in this video since that video may take a long time.  The loader itself is less than a 100 lines of code.  The data structures are a bit more complex since Python loads the json file into the Python program as a nested dictionary structure.

Update Dec 2013:  Check out the code for an improved json_loader on github.

Sample game running with 2d map showing collision tiles shaded red.  Code and graphic files available on github

2nd layer of collision tiles separated out of the 3 layer map by test scripts in the game example.  Sample map included in the github package, available at the link above. 
Update December 13, 2013
Wrote a new blog post on using json_loader with examples of different types of games.

Sunday, December 2, 2012

Getting Android adb working with Pipo Smart S1


The Pipo Smart S1 is a 7" Android 4.1 tablet that costs under $100.  It works great and is quite fast.   It's comparable to the Nexus 7" at half the price.  I changed the firmware to rev3 with instructions from TopNotchTablets.  This download also got rid of the apps that had Chinese language, giving a more comfortable user experience.

The CPU is a Rockwell RK3066 1.6GHz chip.

Rooting the tablet and upgrading the firmware was fast and painless.

Getting the tablet to work with the Android Debug Bridge (adb) was trickier.

Pygame Subset for Android (PGS4A) relies on adb that is included in the platform-tools sub-directory of the Android SDK.


When I first connected the Pipo Smart S1 tablet to my Ubuntu box with a micro USB cable, the build worked, but the install failed.

After figuring out how to use adb, I started to use adb devices to see the connected devices.  It wasn't detecting the tablet.


I found out that adb needs a USB Vendor ID to work properly.  Pipo wasn't listed as a vendor.   I found that the Vendor ID for the RK3066 chip is 0x2207.

Using the Android Developer documentation on Hardware Devices, I created the file /etc/udev/rules.d/51-android.rules and inserted this:


SUBSYSTEM=="usb", ATTR{idVendor}=="0x2207", MODE="0666", GROUP="plugdev"

It still wasn't working for me.  I had USB debugging enabled on my tablet.

I then added the vendor ID code to ~/.android/adb_usb.ini

:~/.android$ cat adb_usb.ini 
# ANDROID 3RD PARTY USB VENDOR ID LIST -- DO NOT EDIT.
# USE 'android update adb' TO GENERATE.
# 1 USB VENDOR ID PER LINE.
0x2207

It's still not happening.  I check out lsusb and see some hope that the device is detected.  


I turn off wifi from the tablet.

I run adb devices again.


$ ./adb devices
List of devices attached 
???????????? no permissions


There's a bit more life.  I run it again as sudo.

$ sudo ./adb devices
[sudo] password for craig: 
List of devices attached 
???????????? no permissions

No go.

I kill the server. Then start it as root.
$ sudo ./adb devices
* daemon not running. starting it now on port 5037 *
* daemon started successfully *
List of devices attached 
ZX7U17M3NX device

It found the device!

I build the Python app:

$ ./android.py build dad/dad_image release install

install:
     [echo] Installing /home/c/Documents/python/pgs4a-0.9.4/bin/dad_image-1-release.apk onto default emulator or device...
     [exec] 5391 KB/s (2741472 bytes in 0.496s)
     [exec] pkg: /data/local/tmp/dad_image-1-release.apk
     [exec] Success

BUILD SUCCESSFUL
Total time: 8 seconds

It looks like the build succeeded.  

Here's a screenshot of the game running on the Pipo Smart S1, transferred using a USB cable with adb.


After I got this working, I worked with my son, my only computer programming student,  to get a similar game working on his LG Optimus S phone.  The main learning points today:

  • using .append to fill a list of objects.   The list target_group contains all the enemies and all the bombs.
  • Set up triggers based on elapsed time use list slicing to control the number of targets on the screen.


After I wrote the blog post, I also found this  on slatedroid.com.  It covers many of the same steps.  I'm not sure if shutting off WiFi is needed.  The person below also seems to have adb working without having to run the adb server as root.  I may fiddle around with more things in the future.  The main thing is that I can connect my tablet to adb in debug mode and install the apk files easily.


Posted 21 November 2012 - 08:31 PM
Just a few tips to those are trying to connect to a RK3066 via ADB on linux.

  • Download & Install SDK
  • Edit udev rules (see step #3), the RK3066 Vendor ID is 2207
  • Restart udev (udevadm control --reload-rules)
  • Edit $HOME/.android/adb_usb.ini, add 0x2207 at the end of the file
  • Restart adb server (adb kill-server && adb start-server)
  • Plug & List your device (adb devices)


At step #2, you should get something like this
SUBSYSTEM=="usb", ATTR{idVendor}=="2207", MODE="0666", GROUP="plugdev"


At step #4, you should get something like this
# ANDROID 3RD PARTY USB VENDOR ID LIST -- DO NOT EDIT.
# USE 'android update adb' TO GENERATE.
# 1 USB VENDOR ID PER LINE.
0x2207

Sunday, November 25, 2012

Porting Pygame Apps to Android


Since my son is on Thanksgiving holiday, I taught him two classes today.  I'm sure he would have preferred fishing.   The first class covered how to port one of his earlier Pygame desktop applications to Android.  The process only took an hour.  The game now works on his LG Optimus S Android phone and he can enjoy playing it while lying on his bed or after school with his friends.

His game, dropper, does not use any raster graphics.  Dropper only uses the primitive shapes from the pygame.draw module.  Despite the simple graphics and lack of sound effects, it's one of the most playable games he's developed.  It works quite well on his phone.

Here's an overview of the simple changes.


  • import android module
  • change screen width and height to 480, 320 (low-end phone screen)
  • change player size to make it easier to dodge bullets on a smaller screen
  • change frame rate to 30 fps to slow down the movements and make the game easier.  The smaller screen makes it more difficult to avoid the bombs.
  • android.init()
  • map the ESCAPE key in pygame to the physical back button on the phone.  He uses this to exit the game loop.
    • android.key_map(android.KEYCODE_BACK, pygame.K_ESCAPE)
  • adjust the height of the text boxes for the Game Over screen and final score.
  • use free clip art to create the android-icon.png file for the Android app launcher
  • use free clip art to create the android-presplash.jpg file for the initial splash screen that shows up prior to the game starting. 
In the future, it might be rewarding for the student to use Inkscape to create a logo for a mock software company.

Since the original game used the keyboard for controls, he added mouse controls.  PGS4A maps the mouse to the touchscreen.  This is so nice.  For this game, he created active areas of the screen to control left and right movement.  There's no instructions, but it seems intuitive to most people playing the game.

The original game also used the default system fonts on Ubuntu.  He saved the fonts from 
/usr/share/fonts/truetype/freefont/FreeSansBold.ttf on Ubuntu to his build directory and packaged the font as part of the Android app bundle. 


Saturday, November 24, 2012

Sprites and Tiles


My son finished his shooter game and I started to research tiles for the next project.

During Thanksgiving break, I started with Tiled TMX Loader.  This initially proved quite rewarding since there were several nice examples of Pygame code that shipped with the library.    I used Tiled Map Editor to make the maps from tile sets.

Since my son wants to show his friends his games on his phone, I was planning to package the Pygame application for his phone using Pygame Subset for Android (PGS4A).    

Unfortunately, when I did the build, I realized that Pygame Subset for Android does not support the XML libraries that Tiled TMX Loader requires.  There does not appear to be an easy way to build the XML C libraries into PGS4A or include a Python library with the application.    Here is a discussion thread from the Pygame Subset for Android forum.  The workaround people were using involved converting the tmx maps to JSON files and loading the map into the Pygame on Android application using the JSON module that was supported by PGS4A. 

Although Tiled can output a tile map to JSON, I realized that all the python JSON library does is load the JSON file data into dictionaries and lists that can then be accessed by the program.  Taking this route, I'm going to need to develop all the map camera movements, layer management, and collision detection myself.  Bummer.   The data is there, but I didn't want to think about how to manipulate it.

Feeling that manipulating map data from JSON files was too much of a task, I instead started to research sprites, basically shelving the idea for a complex map and focusing on understanding smaller lists and dictionaries of tiles made up of 32 x 32 pixel tiles.

piman's sprite tutorial was the most useful.  The application above is basically an extension of piman's tutorial.  Instead of colored rectangles, I used pygame.image.load("filename") to create image surfaces.  I used a single grass tile as the background and simply repeated it.

The controls at the bottom select the character to move.  

def select_character(buttons, mouse_pos, selection):
    selected_char = selection
    for b in buttons:
        if b.rect.collidepoint(mouse_pos):
            selected_char = b.character
    return(selected_char)

I recently realized that I can use pygame.Rect.collidepoint instead of pygame.Rect.colliderect.  The rectangles are the same ones that you use to blit the images onto the screen.

It's easy to get the mouse position with pygame.mouse.get_pos().

In the main event loop, I simply check for the mouse button up or down:
  • elif event.type == pygame.MOUSEBUTTONDOWN:
  • elif event.type == pygame.MOUSEBUTTONUP


Sunday, November 18, 2012

Pygame Subset For Android


My student recently bought an Android 2.2 smartphone on eBay for $40.  It's quite a good deal.  The phone is unlocked and can run games from GooglePlay as well as custom games.

I spent about an hour today teaching a lesson using Pygame Subset for Android.  Wow, talk about big bang for the buck.  By the end of an hour, my student was running a native Android app on his phone completely from a blank text editor.  The app has working animation, touchscreen interaction, and hard-buttons.

Since I was completely new to Android development, I ran into a small problem building the project with Ant.

When I ran the example build from the Pygame Subset for Android, I got an error message when the script ran Ant.

~/$ android.py build mygame install release


Initially, I spent some time trying to create a build.xml file.   This led to a dead end.

The solution is to look at the Target id, android-8.

In the android-sdk directory, you need to have the android-8 platform listed in the platforms directory.


ubuntu-desktop:~/Documents/python/pgs4a-0.9.4/android-sdk$ ls platforms/
android-17  android-8
ubuntu-desktop:~/Documents/python/pgs4a-0.9.4/android-sdk$ 

If you don't have this platform, and you probably won't by default, run the android program within the android-sdk/tools directory.

The reason this wasn't immediately obvious to me is that the error message for the missing android-8 target was at the top of the screen output and the build.xml error message was at the bottom.  I should have read the error messages closely, starting at the top of the output.

run
  $ ./android --help 

for help or

  $ ./android update sdk 

to install API-8, Android 2.2 platform support.